Aurora Borealis

Vad är norrsken?

Norrsken live - norrskenskamera & se aktiviten just nu!

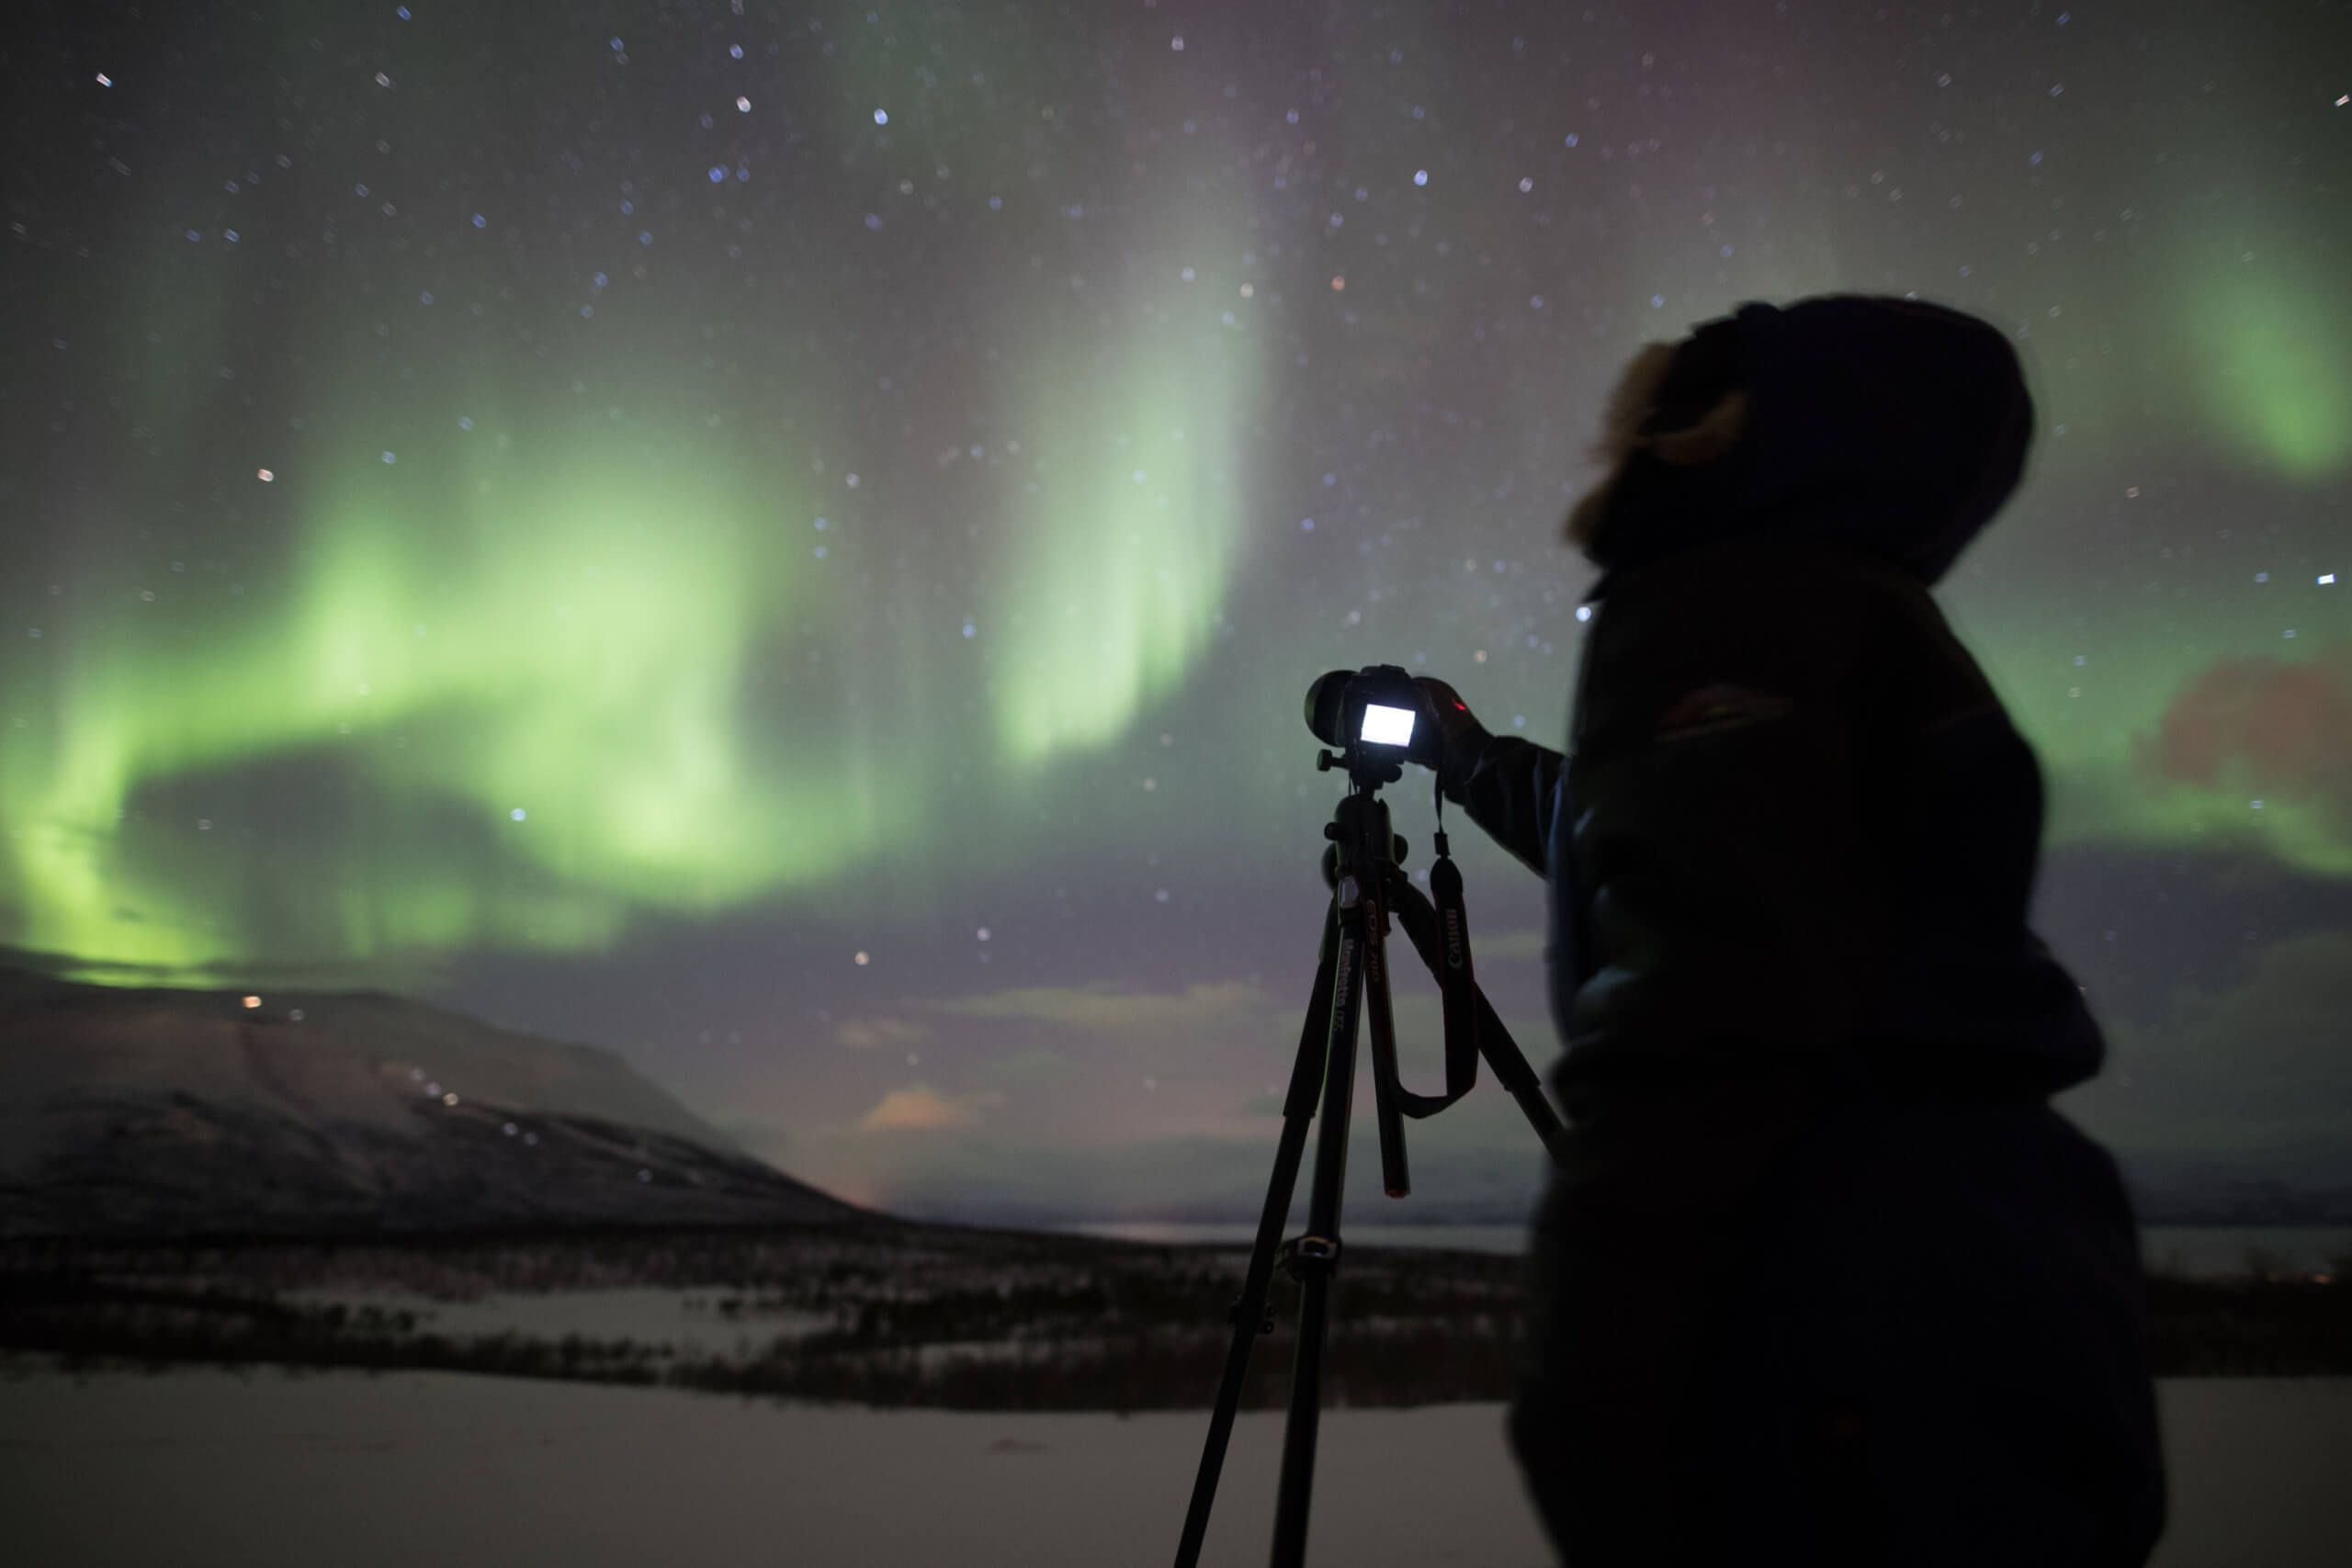
Hur man fotograferar norrsken.

LAPPLAND MEDIA AB
Vad är norrsken?
Learn More
Abisko nämns ofta som den säkraste platsen för norrsken. Varför?
Learn More
Norrskenskamera / Norrsken Live
Learn More
Norrskensprognoser - data
Learn More
Hur fotograferar man norrsken?
Learn More

Vad är norrsken?

Look up at the sky, a clear and starry night. The atmosphere that gives us our blue skies during the day seems to be pulled aside, giving you a clear view of the universe around us.
When you witness Aurora Borealis you are actually seeing the rather invisible night time atmosphere beautifully illuminated.
Understanding how Aurora Borealis is created takes you on a journey into space, all the way to the sun. It is here the first half of the story starts.

The sun ejects a steady stream of high-energy particles. The amount of particles increases from time to time, that which we call solar storms. The other half of the phenomena is hosted by Earth itself, its atmosphere and magnetosphere. The atmosphere contains a variety of particles and molecules, mostly nitrogen and oxygen. The magnetosphere is generated by the Earth’s iron core, like a large magnet.
The plus pole and minus pole create magnetic field lines, dipping down in oval formations around the north and south poles. When the charged particles from the sun surge towards Earth, they can become captured in the magnetic field lines and are pulled downwards towards the poles.
On their way down, they collide with the particles in the atmosphere. The transfer of energy from solar particles to atmospheric particles results in the breathtaking light show of the aurora.

Abisko nämns ofta som den säkraste platsen för norrsken.
Varför?

Well, the geology, topography and history of Abisko all play important roles. First of all, the auroral oval, created by the interaction of solar particles, atmosphere and magnetic field lines, happens to usually run right over Abisko.
In addition, the mountain range to the west forces precipitation-heavy air to rise when moving towards Abisko. Before arriving, it dumps the majority of rain or snow on the mountainsides. Thus the air here is unusually clear year round.
Add to that the exciting cultural and scientific history of Abisko, stemming partly from early mining investments, bringing the railroad for shipping off ore from Narvik in Norway.
Along with the railroad came the curious, both scientists and tourists, all fascinated by this unique subarctic wilderness landscape and of course the mystery of Aurora Borealis.
Over 100 years of continuous transportation, research and the beautiful national park have enriched the lives of people from around the world. Welcome to an experience only found in Abisko!
A Unique Experience from Lappland Media AB

Norrskenskamera Live

Vy över Abisko nationalpark

Bild uppdaterad var 10e minut.

Aurora Borealis Live    

Norrskensprognoser - mätningar som hjälper oss att förutspå bra norrsken

To get a good northern lights forecast you can use data from eg. NASA and the Swedish Institute for Space Physics. The auroras have been speculated over and studied in great detail here in Lapland, with over a hundred years of expeditions, instrument development and international cooperation.

Today, a network of scientific instruments in space and here on Earth provide round-the-clock information about the when, where and how intense of our alluring Aurora Borealis.
Here we wish to guide you through some of this information so you can predict your own aurora experience and have a greater understanding of what is actually going on up there.

Jordens magnetosfär hjälper oss att se vad som är på gång

The data comes from the magnetometers based in Kiruna at the Swedish Institute of Space Physics. Click on the link and you will see data in a Kiruna Eda Magnetogram for today’s date. This is a record of the amount of activity in the portion of the magnetosphere around Kiruna.
When high-energy particles travel into the atmosphere along the magnetic field lines, the activity rises, thus resulting in aurora. So, a rise, or peaks, in the magnetogram means there is something going on in the atmosphere in the region around Kiruna!

Norrskensaktiviteten på jorden

This image is produced using the most recent data collected by the NOAA POES satellite.

The satellite collects data on energy levels in the atmosphere. It provides an estimate of the location, extent and intensity of aurora on a global basis and can be good to use for a good northern lights forecast.
It is updated every 10 minutes, giving you a guide to the possibility of seeing aurora at a given location at the time of the most recent satellite pass.

The greater the power flux recorded by the satellite (0 to 10 erg/cm2/s), the redder the auroral oval, and thus the greater the likelihood of seeing aurora. Worth noting is the n-factor, to the left of the image, which tells you how accurate the image is.
This is based on the satellite performance at the time, i.e. the amount of data collected. The lower the value, preferably far below 2.0, the more accurate the image.

The red arrow points to the noon meridian. Wait for the update and see how the oval shifts!

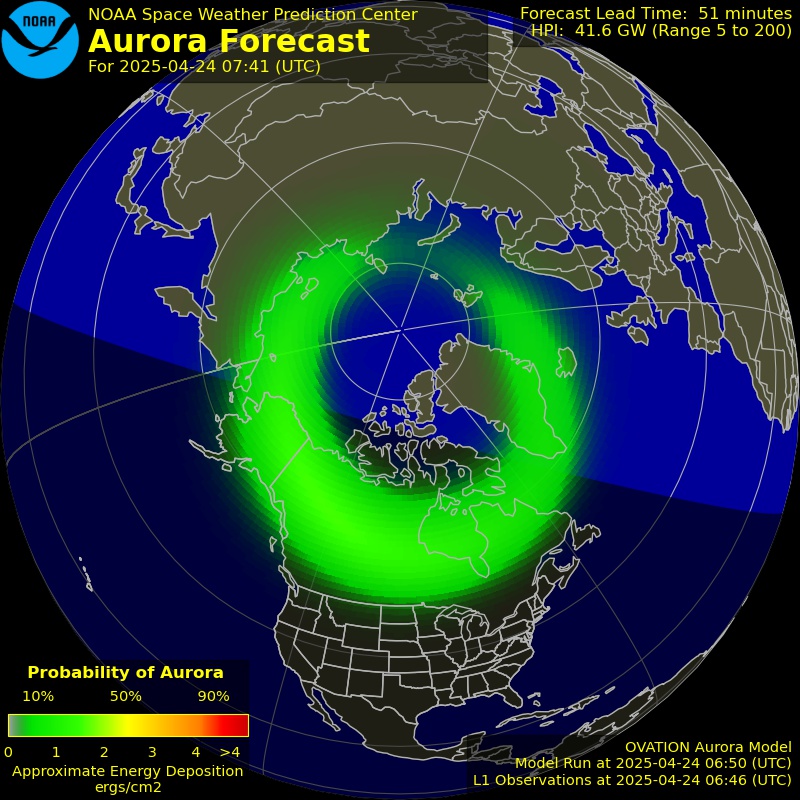
Hur använder du dessa data för att förutspå norrsken?

First, check out the latest position of the auroral oval, and the quality of the data (n-factor).
Next, how much activity is there? How “red” is the oval?
After that, look at the raw data from Kiruna.
Is there anything being recorded by the instruments here?
And when everything says there is a show on the way – get out to see the it live!

If the local K-index is 2 or higher in Kiruna or Abisko you do have a good northern lights forecast and good chance for a great show. If you are on lower latitude you will need a higher index to see the Aurora in a good way.

Hopefully your prediction has set you centre stage and just in time for a beautiful performance.

Good luck!

Hur fotograferar man norrsken?

Among the most important things to think about when photographing aurora is to hold the camera still.
If you do not have a tripod, place your camera on the ground or anything else steady, direct the lens towards the aurora and take the picture.
If your camera has settings for exposure times, allow for as long exposure as possible, 10 – 30 seconds is usually enough.

If you have a little more experience and your camera allows for manual settings, try the following tips to capture your aurora image in the best possible way.

Innan du åker ut

  • Make sure you start with fully-charged batteries since they quickly run down out in the cold.
  • Choose a camera with a wide-angle lens and place it steady, preferably on a tripod. A compact camera will work well, but a digital SLR camera will enable better images. Since all the adjustments are done in the dark, it is a good idea to become well-acquainted with your camera and perhaps read through the instruction book one last time before you set out.
  • Take a head lamp with you. The light is convenient when adjusting your camera settings, but also very useful for lighting up a nice foreground. For example it could be nice to light up a person or something else in the image. A flash unfortunately gives an unnatural lighting and can spoil the atmosphere you want to convey in the image.

Kamerainställningar för norrsken

  • Set your camera to ISO 800 or higher. With the newer cameras you can set the ISO higher without too much noise in the image. Open the aperture as wide as possible, between f2.0 and 4.0. A wide-open aperture allows for more light to reach the sensor per second.
  • If you do not have a foreground, set the focus to infinity to make the stars sharp. With a wide-angel lens you can focus on an object ten meters away and still capture both beautifully sharp aurora and a star-studded sky.
  • The exposure time varies depending on your ISO and aperture settings as well as how strong the aurora is. A simple tip is to take a picture, evaluate it on the LCD screen or histogram and make adjustments from there. If the image appears too dark, increase the exposure time. It can be anywhere between 5 – 60 seconds.
  • When you are done photographing, place your camera in an airtight bag before taking it inside. Otherwise you risk condensation in the camera. Let the camera warm up inside the bag before taking in out in room temperature.

Vill du lära dig mer om att fotografera norrsken, stjärnor, galaxer och den arktiska miljön? Då är du välkommen att delta på en av Peter Roséns norrskensfotokurser i Abisko nationalpark eller Kiruna. Samtliga deltagare på övernattningsturer har fotograferat norrsken på ett fint sätt sedan 2012.


© 2020 Peter Rosén/Lappland Media AB
All rights reserved